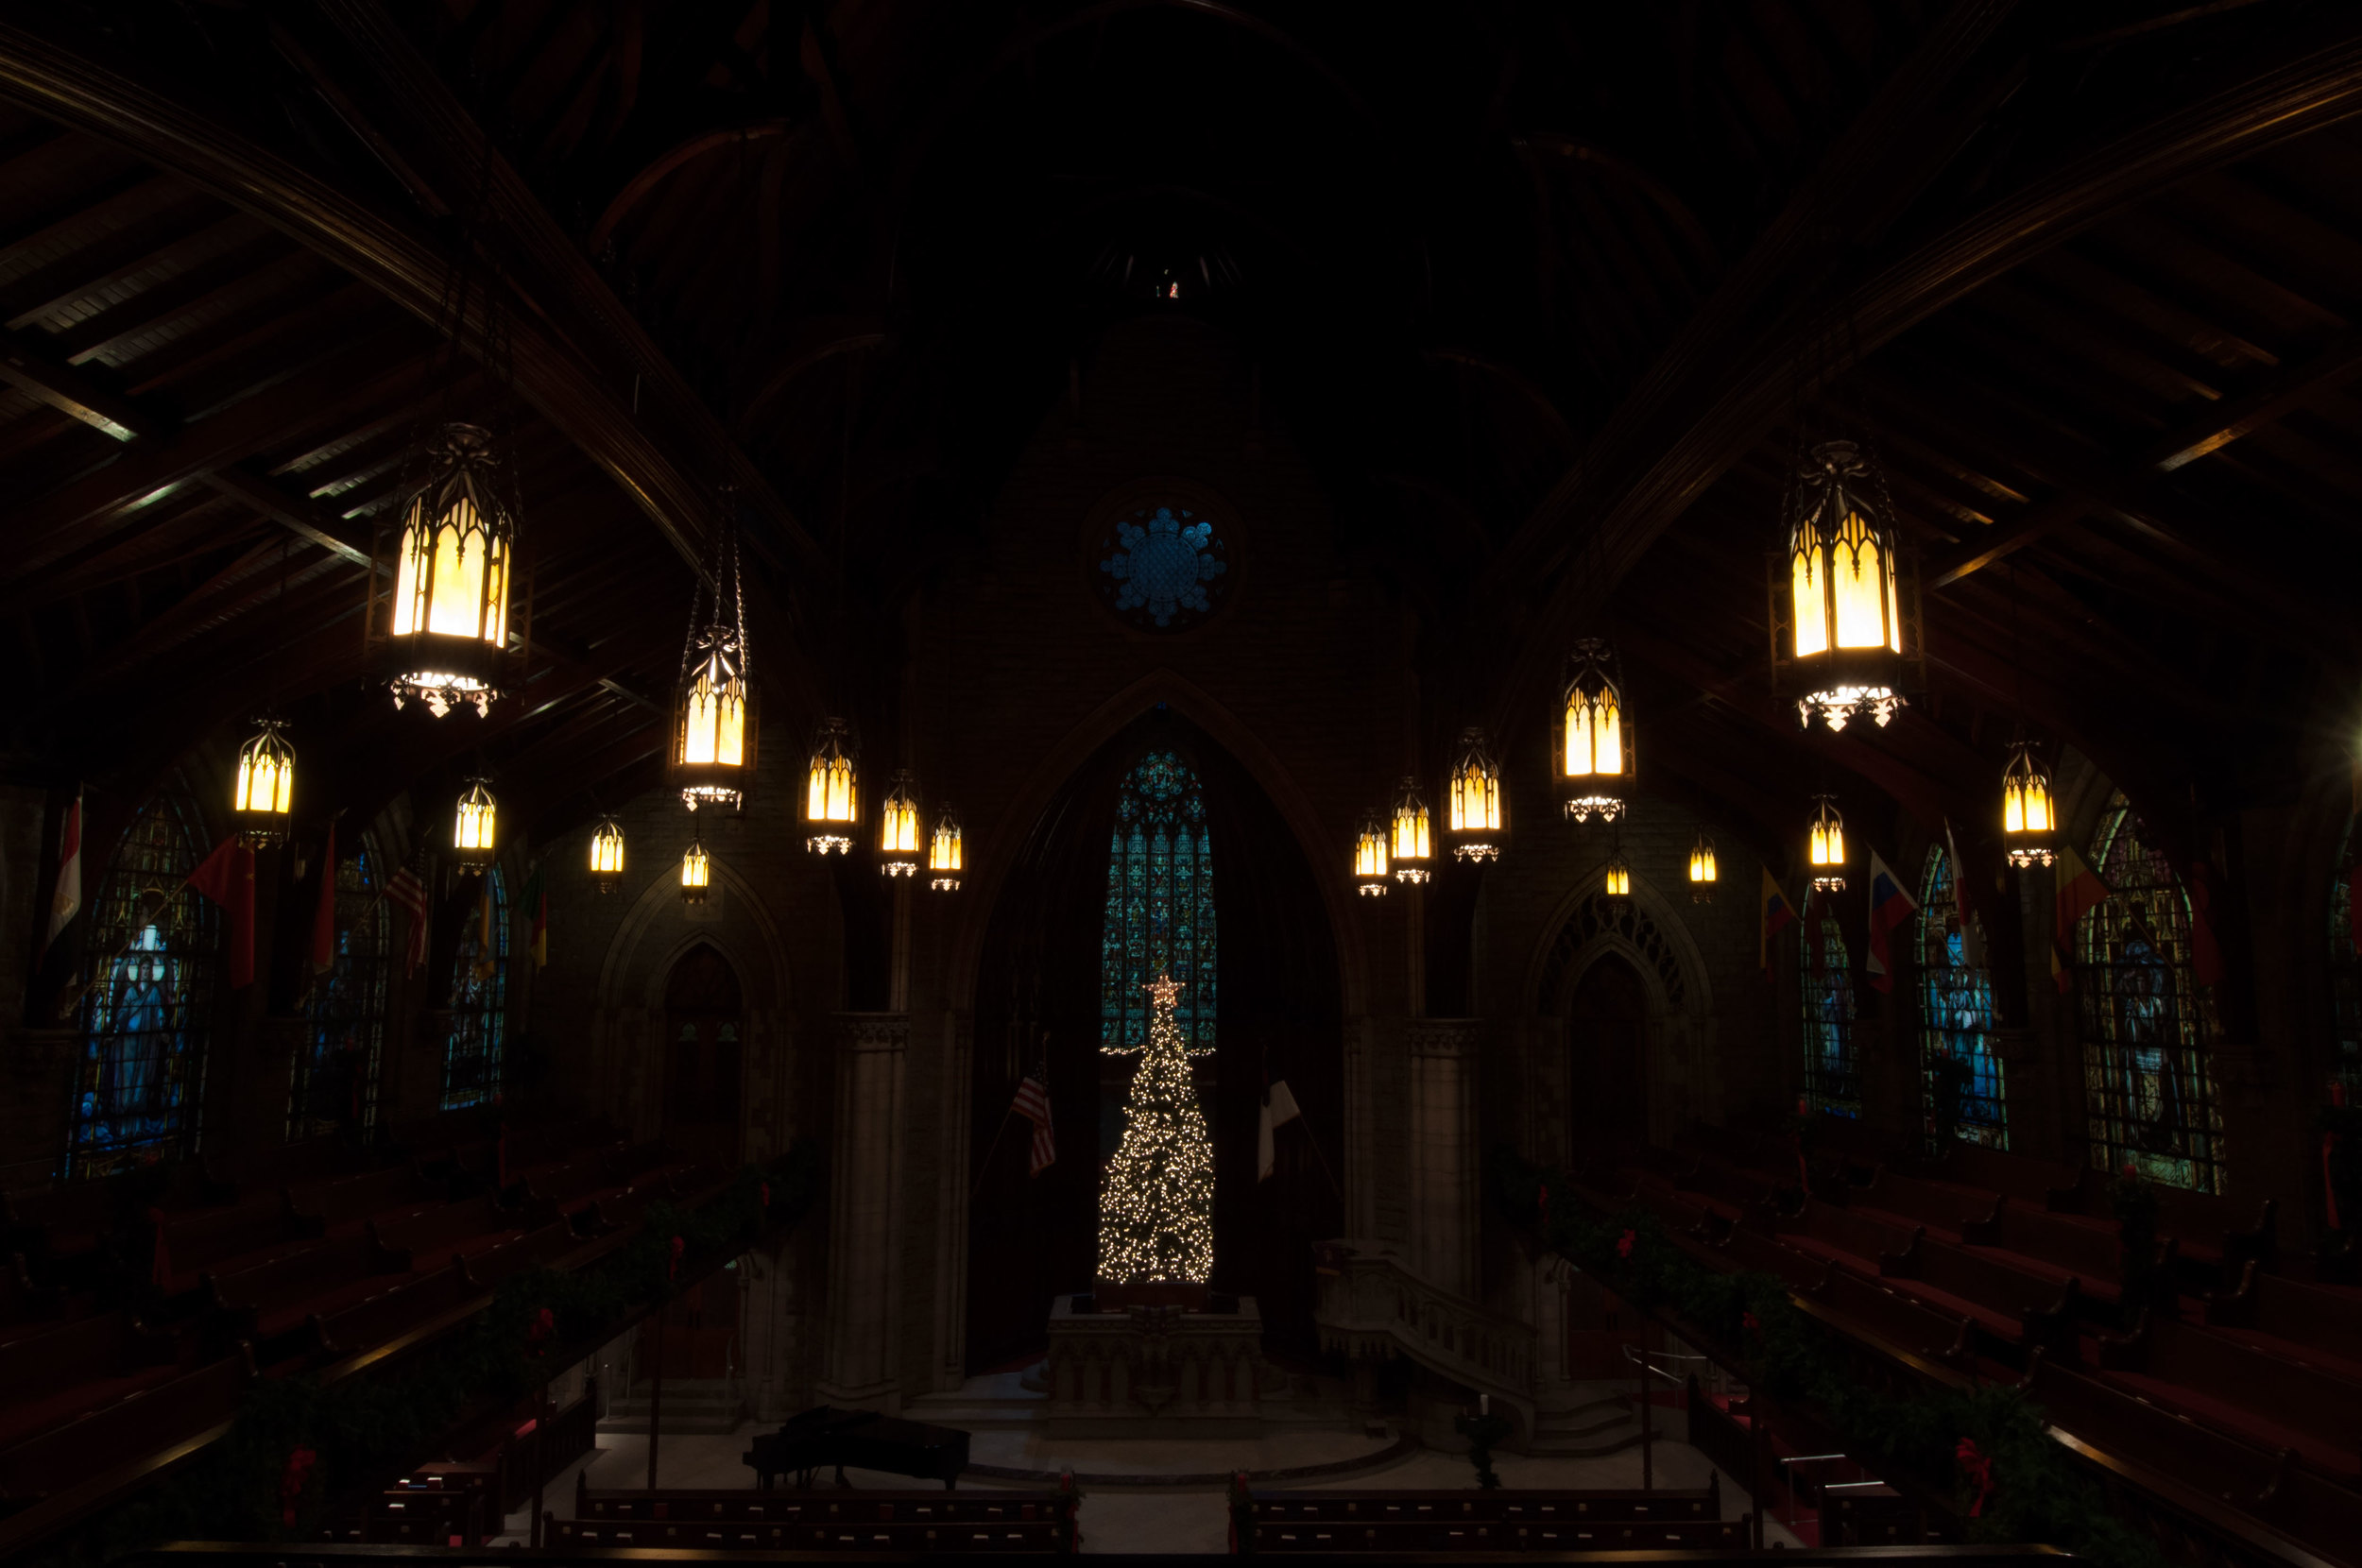
Let’s start with the “Christmas in May”. So thinking about what to post tonight, I decided to go back to my photos from December 2011 and use a picture I took of the First Presbyterian Church of Pittsburgh. I’ve had three people in the last week mention the picture I originally posted of this church back when I took it. It occurred to me that I never really used any other pictures from that photo walk. Therefore we have Christmas In May. When I look at these pictures all I can think about is Christmas.
Here is the link of the original I posted over a year ago:
Click Here
Don’t forget to look at the rest of the post below the picture.

To purchase a print or view the entire gallery, please click the photo above.
HDR Stages:
So you’ve probably seen me comment in past blog posts about how many exposures I’ve taken and whether they were auto-brackets. So of you might be wondering what the heck I am talking about. I thought I would show you what it takes (in stages) to create my HDR photographs.
First, I take three photos or more of the same subject either manually or with an auto-bracket function on my camera. Here is what they look like for tonight’s photo right out of the camera. Notice, none of them look great, but the EV (Exposure Value 0 is what the camera thinks is the best picture and is what most camera will produce)

EV 0 - this is the exposure the camera thinks is perfect.
EV -2 This is the under exposed picture.

EV +2 This is the over exposed picture.
Then I merge them using Photomatix Pro to create the HDR image. If you are wondering what HDR is, see this earlier post that covers this topic by clicking
HERE
As you can see, the HDR picture doesn’t look great at this point and they normally don’t look good at this stage.

This is the HDR image right out of Photomatix Pro. Ugly right!!
Finally, I take the HDR image and all the original images into Photoshop CS6 to do some blending, cropping, color correction, etc…. some of which is my secret sauce. But in the end, you get the final product. On average, it takes me between 20 minutes to an hour per picture to get a final product I am happy with. Which gets us back to the final image that I posted tonight.

Final Photograph